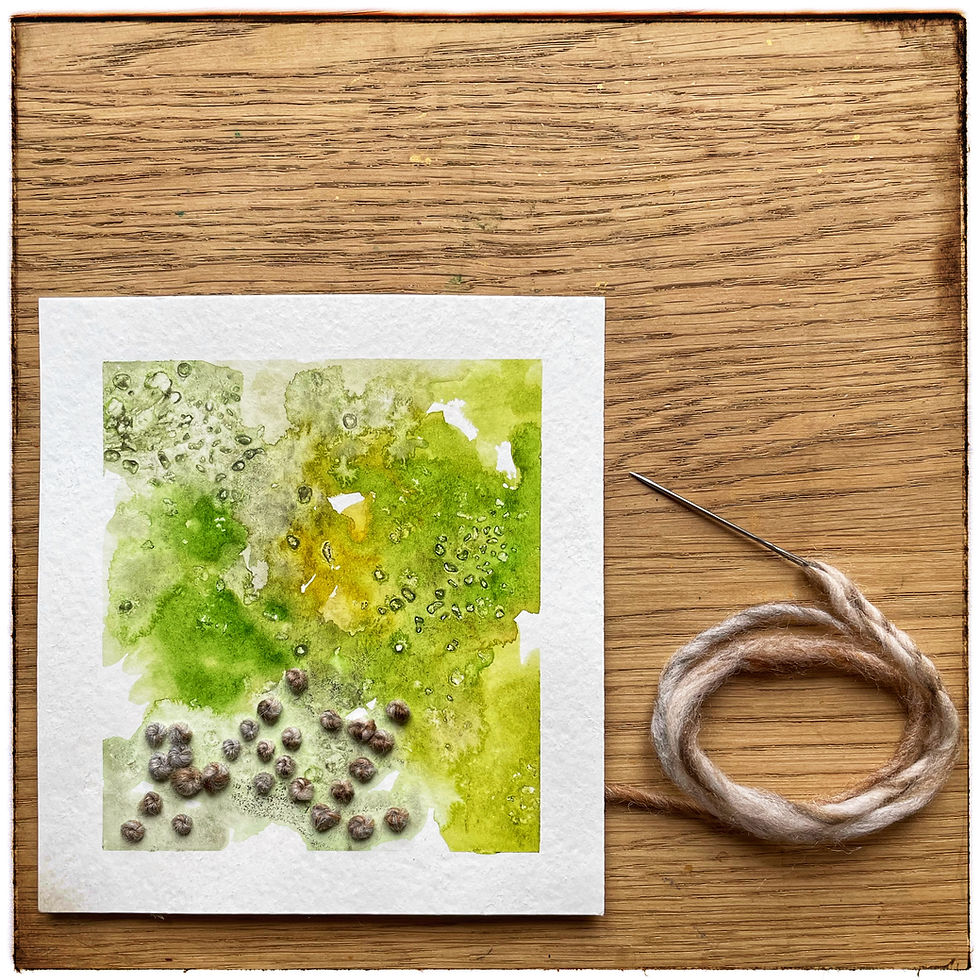
The Buddhist Method of Sewing a French Knot
- Lara Coutinho

- Apr 30, 2023
- 3 min read
Updated: May 23, 2023
We know how our lives are going or how we genuinely feel while sewing a French knot "not too tight, not too loose."

French knots are a beautiful and versatile #embroidery stitch that can add dimension and texture to any project. However, for those new to embroidery, this #stitch can be a little tricky to master.
Today, we will go over the step-by-step for creating a #frenchknot and provide some tips to help you get a perfect stitch.
Do not forget that my example will be on paper and not fabric.
Step 1: Thread the needle
Choose the desired line and thread the #needle. It is best to use a single thread to embroider a delicate knot. If you want to make a bolder knot, use two or three threads together or a more consistent #yarn.
On the opposite side of the needle, knot the end of the #thread.
I advise you to make the holes in the paper before starting. It will make the #sewing a lot easier, but it requires a general idea of where you want to sew.
Step 2: Wrap the wire
Pass the needle through the hole in the paper where you want to create the knot.
Hold the needle in your non-dominant hand and use your dominant hand to wrap the thread around the needle once.
Keep the wraps tight and together, but don't twist the yarn.
Step 3: Insert the needle
Holding the wraps in place with your non-dominant hand, insert the needle back into the same hole in the paper as the original stitch.
Step 4: Pull the line
As you pull the needle through the paper, use your non-dominant hand to hold the wraps in place. Pull the thread gently and gradually increase the tension as the knot forms.
Step 5: Finish the knot
Once the knot is formed, carefully pull the needle out and thread it to the back of the paper.
***
Tips for creating perfect French knots on paper:
- Paper thickness varies depending on the yarn thickness you are using to sew. A fine line works on regular paper (80 GSM), but a thicker line will need an appel like the one we use for watercolor (from 220 to 400 GSM).
The paper I'm using in the example is 250 GSM from Canson.
- Experiment with different thread weights and colors for other effects as your practice improves.
- Keep your wraps together. The closer the wraps are, the more defined the knot will be.
- Creating the perfect French knot takes time and practice, but the result is worth it. Keep on!
"Not Too Tight, Not Too Loose." - Buddha
- Practice your tension: the balance between too tight and too loose, as the wrapping and thread tension can significantly affect the knot quality, size, and shape.
One of the biggest secrets of the French knot is related to Buddhist practice: "Not Too Tight, Not Too Loose."
"There's a well-known story about a sitar player (in some versions, it's a lute player) who was discouraged with his meditation practice and went to the Buddha to ask for instruction.
"What happens when you tune your instrument too tightly?" the Buddha asked.
"The strings break," the musician replied.
"And what happens when you string it too loosely?"
"When it's too loose, no sound comes out," the musician answered. "The string that produces a tuneful sound is not too tight and not too loose."
"That," said the Buddha, "is how to practice: not too tight and not too loose."
When I first reviewed how to do it with my online teacher Gimena Romero, I loved how she explained that we could check how our life is going while sewing a French knot.
I sew a lot at the end of the day, and if I'm a bit stressed, the first knots do not come out so well: they come out too tight or loose. 😅)
***
In conclusion, the French knot is a beautiful embroidery stitch that can add a special touch to any project. On #embroideryonpaper adds a lot of texture and a touch of poetry.
With some #practice and patience, you can master this stitch and #create beautiful knots to enhance your embroidery work.
Remember to keep your wraps tight, experiment with different thread weights and colors, and don't be afraid to practice until you get the perfect knot.
Don't forget to let me know in the comments what you think about the Buddhist approach to sewing French Knots. I'm curious to know your opinion.
Happy sewing!


Comments